If you're looking to breathe new life into your home, nothing makes a statement quite like beautifully restored pine flooring. Whether you're a DIY enthusiast tackling your first project, a young professional giving your space a makeover, or a design professional seeking inspiration, the warm, natural charm of pine wood combined with a high-quality varnish finish can completely transform any interior. In this post, we’re diving into the magic of floor sanding transformations—specifically with pine wood—and how a proper varnish finish can elevate your space.
Why Choose Pine Wood Floors?
Pine wood has long been a favourite in UK homes for its unique grain patterns, warm golden tones, and natural rustic appeal. Unlike laminate or engineered floors, solid pine adds authentic character to your floors—a perfect match for both traditional interiors and modern minimalist designs.
Another benefit? Pine is relatively soft and cost-effective compared to hardwoods like oak. This makes it ideal for DIY projects, rental properties, or historic home restorations where you want a beautiful finish without breaking the bank.
However, pine’s softness also means it scratches and dents more easily. That’s why a proper sanding and finishing process is essential, not only for looks but also for longevity and durability.
Step-by-Step Sanding: Revealing the Beauty Beneath
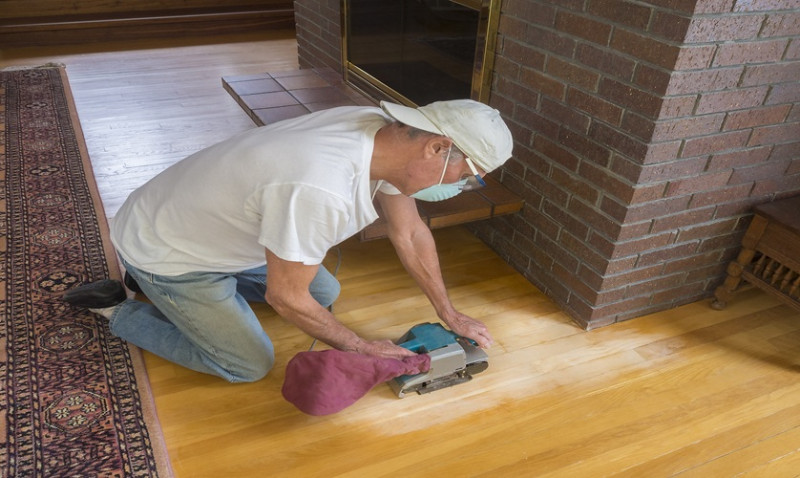
Floor sanding is more than just surface preparation—it's a transformative process that strips away years of wear, damage, paint, or previous stains to bring your pine wood back to life. Here's a quick overview of the process:
- Preparation: Remove all furniture, nails, staples, or tacks. Ensure the floor is clean and dry.
- Rough Sanding: Start with a coarse grit (typically 24–36) to remove the top surface layers and level the boards.
- Medium Sanding: Use medium grit (60–80) to smooth out deep sanding lines and refine the surface.
- Finish Sanding: Finish with a fine grit (100–120) for a silky-smooth surface ready for varnishing.
- Edge Sanding: Reach corners and borders with an edge sander to ensure uniformity.
Proper sanding is key to achieving an even colour and flawless finish. Always sand in the direction of the grain to avoid swirl marks and preserve the natural flow of the wood.
Choosing the Right Varnish Finish
Once your pine floor is perfectly sanded, it’s time to enhance and protect it with a varnish finish. Varnish not only adds a beautiful sheen—it also acts as a protective layer against foot traffic, spills, and wear. There are several types of varnish finishes, each offering a unique appearance and level of durability.
| Varnish Type | Finish | Durability | Best For |
|---|---|---|---|
| Water-Based Polyurethane | Clear, non-yellowing satin or gloss | High | Modern interiors, maintaining light pine tones |
| Oil-Based Polyurethane | Warm, amber finish with rich depth | Very High | Traditional or rustic styles |
| Hard Wax Oil | Matte, natural-looking | Medium | Eco-conscious homes wanting minimal shine |
If your goal is to maintain the pale, Scandi-inspired look of freshly sanded pine, go with a water-based polyurethane. For more dramatic depth and warmth, oil-based finishes are unbeatable. Whichever you choose, multiple coats (usually 2–3) are recommended for optimal wear and aesthetic.
Before and After: The Power of Floor Sanding
The transformation from tired, scratched, and possibly painted floors to clean, glowing pine is truly astonishing. Once sanded and varnished, your floors will reflect light beautifully, instantly modernising your space while preserving the charm of real wood.
Don’t just take our word for it—here are some real-life examples:
- Victorian Terraced Home: Pine floors under years of grey paint restored to reveal golden tones and completed with a clear satin varnish. The result? A bright, warm living room with character and texture.
- Modern Flat Renovation: Sanded original pine floors finished in matte hardwax oil to match a minimal interior. Natural textures offset clean, white walls perfectly.
- Designer Loft Space: Sanded and dark-stained pine floors sealed in glossy polyurethane for a rich, luxurious finish complementing exposed brick walls and industrial design elements.
DIY Tips vs. Hiring a Professional
Many handy DIYers in the UK can successfully complete a floor sanding project over a weekend with rental equipment. However, floor sanding and finishing require patience, precision, and a bit of elbow grease. Here are some pros and cons:
- DIY Pros: Cost savings, flexible timing, hands-on satisfaction.
- DIY Cons: Potential for uneven sanding, dust control issues, risk of damage if tools are used incorrectly.
- Professional Pros: High-quality finish, time-saving, expertise with difficult areas (halls, borders, worn edges).
- Professional Cons: Higher upfront cost, scheduling constraints.
For small rooms or test projects, DIY can be a great entry point. But for whole-home renovations, or if you want flawless results suitable for photography or show homes, it’s often worth investing in a professional floor sanding service.
Maintenance Tips for Varnished Pine Floors
Once your pine floor is beautifully sanded and varnished, you’ll want to keep it that way. Here are some maintenance tips to prolong the life and beauty of your finish:
- Use rugs or mats at entrances to reduce dirt and grit.
- Vacuum regularly and use a damp (not wet!) mop for cleaning.
- Avoid harsh cleaners; use pH-neutral, wood-safe products.
- Stick felt pads on chair legs and furniture.
- Recoat high traffic areas every few years to maintain protection.
Pine may be softer than oak, but with proper care and maintenance, a varnished pine floor can last for decades and age beautifully over time.
Final Thoughts: A Timeless Choice
The marriage of pine wood's natural beauty and the protective allure of varnish is a winning combination for UK homes of all styles. Whether you’re looking to refresh a single room or transform an entire property, investing in floor sanding and finishing is a decision you won’t regret. Not only does it add value to your home, but it also creates a warm, welcoming environment that you'll enjoy walking on every day.
So pick up that sander—or dial up a trusted pro—and rediscover the charm lying just beneath your feet.
