Whether you've recently pulled up an old hardwood floor or spotted a bargain lot of reclaimed boards online, repurposing hardwood flooring into usable lumber offers cost-effective access to high-quality timber. Instead of tossing out old boards or letting them gather dust, why not reimagine them into furniture, decorative pieces, or new flooring? If you're a DIY enthusiast, interior designer, or professional tradesman in the UK, mastering this sustainable skill can unlock incredible creative opportunities—while protecting your budget and the environment.
Understanding What You’re Working With
Before diving into transformation, it's crucial to understand what kind of hardwood you have. Most UK homes feature hardwood species like European oak, maple, ash, or walnut. Reclaimed flooring typically comes tongue-and-groove milled, with surface finishes, nails, and possible wear that need removing. Identifying the wood type helps you predict how it will behave under tools and which applications it's best suited for.
Original flooring thickness typically ranges between 18mm–22mm. Most planks are narrow strips, which limits their reusability in large-scale projects, but they shine in smaller furniture builds or accent walls. You may encounter adhesives, underlayers, or even embedded screws—watch for these during inspection.
For professionals, using species identifiers or moisture metres is ideal, but for home users, a smooth sand and visual inspection can help identify grain and colour traits of the lumber. Remember, knowing your material saves time and helps plan your project precisely.
Essential Tools and Safety Gear
Working with reclaimed hardwood flooring requires a few essential tools—many of which are typical in a home DIY workshop. Here’s what you'll need:
- Crowbar or pry bar: For lifting flooring without breaking planks.
- Hammer and nail puller: To remove any nails or fasteners embedded in the wood.
- Metal detector or a strong magnet: For locating hidden nails that could damage cutting tools.
- Table saw or circular saw: To rip down and square up boards.
- Jointer and planer (optional but ideal): For correcting warps and creating smooth edges.
- Orbital sander with various grit sandpapers: For surface prep.
- Dust mask, gloves, and eye protection: Always prioritise safety.
These tools allow you to mill and prepare the flooring into clean, usable lumber. Safety tip: Because reclaimed wood may contain metal remnants, always visually inspect AND use a magnet to avoid damaging blades and endangering yourself.
Step-by-Step: Transforming Flooring into Lumber
Follow these straightforward steps to convert your old hardwood floor into functional timber lengths ready for your next project:
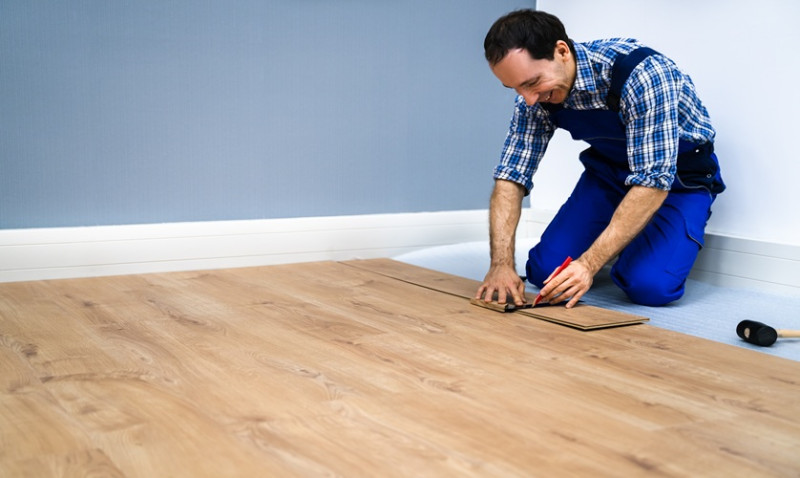
- Lift the Flooring Carefully: Pry up the boards starting from one edge. Work slowly to minimise cracking or splitting, preserving the tongue and groove if possible.
- Remove Finishes and Fasteners: Strip off any varnish or lacquer with a heat gun or sander. Use pliers and a nail puller to remove nails. A metal detector helps greatly at this point.
- Cut Off Damaged Edges: Using a table saw, remove any damaged, cupped, or uneven edges from each board. This makes future handling and joining far easier.
- Optional—Joint and Plane: If you're after completely even boards, a thickness planer and jointer will help flatten and square your timber. However, many projects can adapt to imperfect boards.
- Sand and Prepare: Sand down your boards using progressively finer grit sandpaper. This enhances the grain and removes residue. For decorative pieces, you may want to leave some patina or marks for character.
- Moisture Check: Let the boards acclimate to your indoor working environment for a few days to avoid warping, especially if they've been stored in a garage or shed.
Once complete, you’ll have beautiful character-filled hardwood ready to be used in custom-built furniture, picture frames, shelving units, decorative wall panelling, and more.
Creative Ideas for Reclaimed Hardwood
If you're unsure how to use your newly prepared lumber, here are some smart applications loved by DIYers and professionals alike:
- Floating Shelves: The slim strips make perfect rustic shelving when mounted with bracket hardware or concealed wall studs.
- Furniture Making: Side tables, coffee tables, and media units can all use reclaimed wood for faces, tops, or detail trims.
- Wall Cladding: Create statement feature walls in bedrooms, lounges or offices using tongue-and-groove planks.
- Picture and Mirror Frames: Beautiful hardwood grains shine as frame material.
- Countertops or Bench Tops: When laminated and planed, these boards can be fashioned into solid surfaces.
Note that by combining these boards with other joinery elements—such as metal legs or painted carcasses—you can create on-trend modern-rustic aesthetics ideal for today's UK homeowners.
Benefits of Reclaiming Hardwood Flooring
Aside from the obvious money-saving advantage, transforming used hardwood into lumber provides access to premium timber that often surpasses the quality of modern mass-produced wood. Many older homes used oak or maple that is heavier, denser, and visually richer than newer equivalents.
This practice is also environmentally sustainable. Giving wood another life helps reduce landfill waste and the demand for newly harvested trees. As awareness of eco-conscious interior design grows across the UK, upcycling reclaimed materials also improves your project’s ethical appeal—something especially appreciated by clients if you're an architect or tradesman.
Another benefit? Storytelling. Repurposing floorboards from an old Victorian terrace or a family cottage adds a heritage element that mass-produced timber simply can’t capture. When selling on or gifting your handmade items, the narrative boosts their emotional and aesthetic value.
Common Challenges and How to Overcome Them
Reclaiming hardwood does come with its pitfalls. Warping due to moisture exposure, twisty boards, nail holes, and over-sanding are common issues. However, with patience and careful handling, most of these challenges are easily overcome.
Keep in mind:
- Curved or twisted boards: Use them for smaller components or cut them into narrower strips.
- Nail holes and knots: Highlight them as rustic features or fill with epoxy resin for a clean modern look.
- Varying board thicknesses: Group and use similarly sized pieces in the same project section to avoid uneven surfaces.
Don't let imperfections put you off—they're often what make the finished piece one-of-a-kind.
Where to Find Reclaimable Hardwood Flooring in the UK
If you haven't already got hardwood flooring lying around, consider checking out these go-to sources around the UK:
- Architectural salvage yards
- Facebook Marketplace or Gumtree
- eBay (search for keywords like “reclaimed flooring wood”)
- Demolition or house renovation projects—talk to local tradespeople
- Contact local timber reclamation centres
Prices may vary depending on the species and condition, but it’s not uncommon to find oak or walnut flooring under £15/m²—a fraction of the cost of virgin hardwood timber.
Final Thoughts
Transforming hardwood flooring into usable lumber isn’t just a nifty upcycling technique—it’s a craft that blends sustainability with design. Whether you're redecorating your own home, experimenting as a DIY hobbyist, or producing work professionally, reclaiming timber challenges your creativity and delivers character-rich materials that stand out.
Start with a single square metre of old boards and see what you can turn it into—you'll be amazed at what lies beneath that tired old finish. Dust off your tools and give those floorboards a second life!
